I have been asked to give a more detailed explanation of my method of construction of wheels for my Harley-Davidson model (and for any other model with wire-spoked wheels), so here it is:
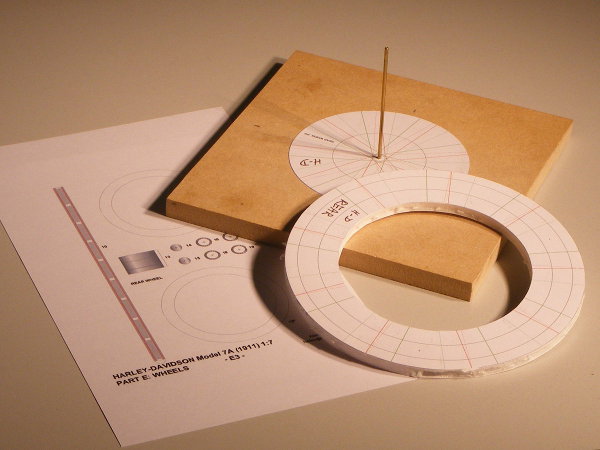
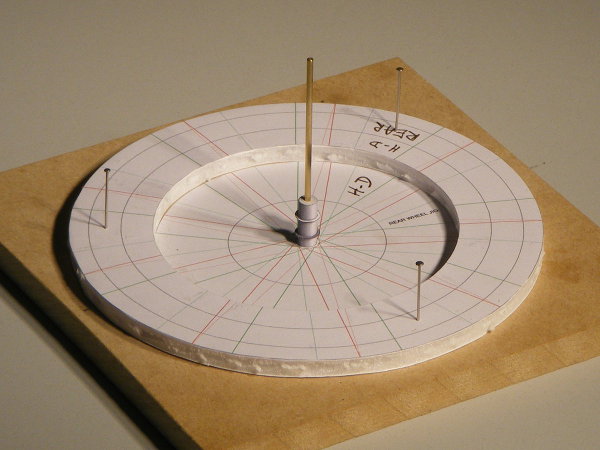
To start with, you require a baseplate a little larger than the printed jig and a piece of rod suitable to go through the centre of the wheel hub. For my half-size wheels, I used a piece of medium-density fibreboard 135mm square and 8mm thick, and a brass rod 1/16 in (1.5mm) in diameter and 60mm long. Drill a hole part-way through the centre of the baseplate to hold the rod firmly upright.
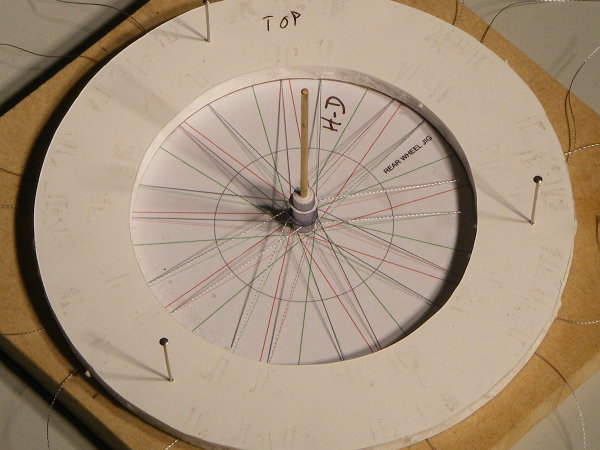
Cut out the centre portion of the printed jig (along the outermost internal circle), punch a small hole in the centre, and glue it to the baseplate, centred carefully on the drilled hole. Take the remaining ring of the jig and glue it to some material of similar thickness to the distance between the hub flanges - I used 5mm foamboard. Cut out this ring.
[Note that on this photograph the outer ring of the jig has two extra circles drawn. These are not needed, and are not shown on the jigs in the kit.]
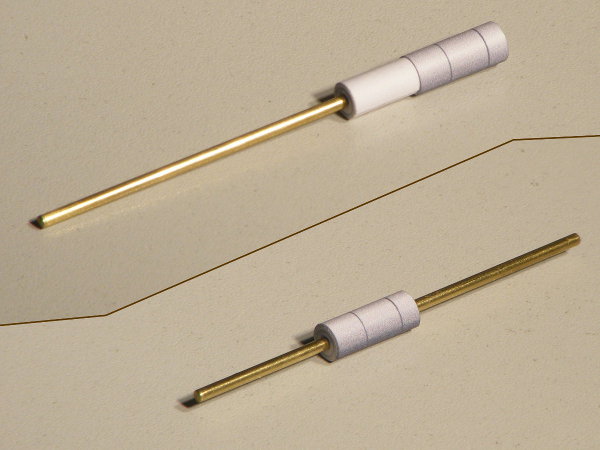
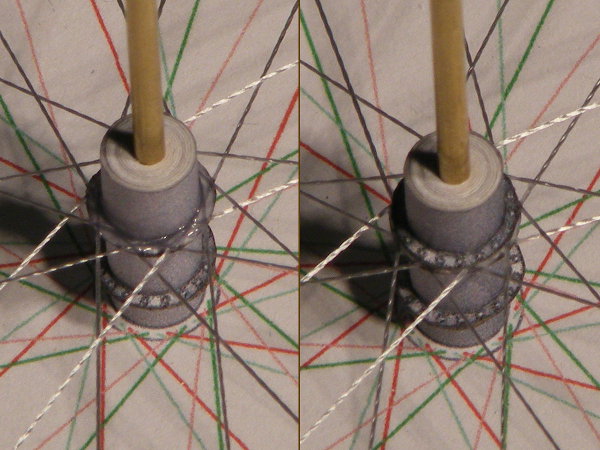
Now form the hub drum (part E4 for the front wheel, E13 for the rear). Take a strip of paper the same width as the hub, and wrap it tightly round your central rod until the resulting cylinder just fits inside the hub. Glue it there.
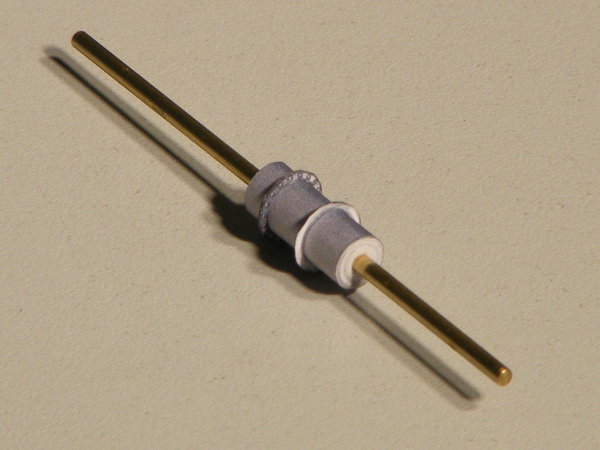
Cut out the four flange sides (E5-8 for the front wheel, E16-19 for the rear), making sure that the hole in each just fits over the hub. Take two of them, and glue to the hub just inside the marked positions, with the printed sides facing each other.
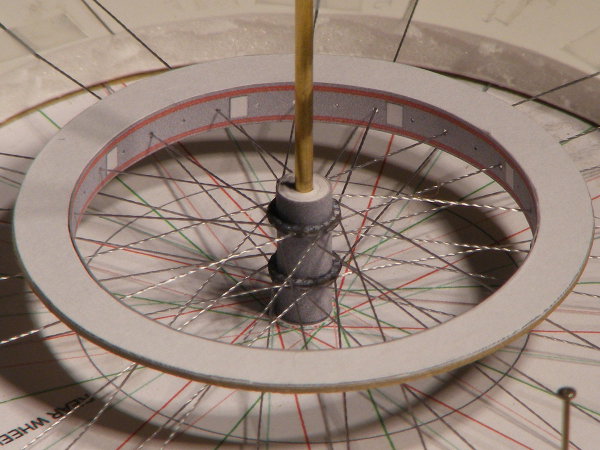
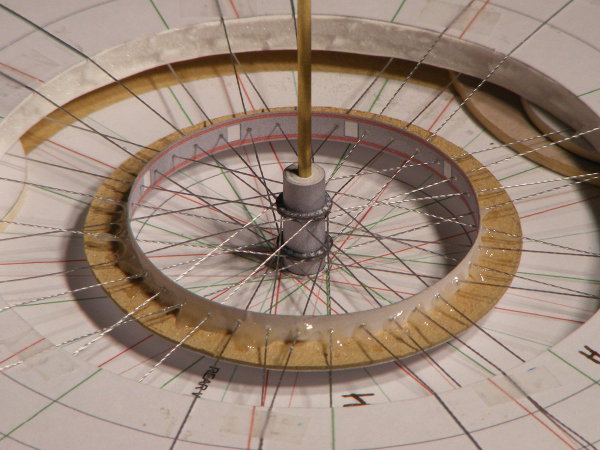
Place the rod into the hole in the baseplate and push the hub down on to the baseplate. Pin the outer ring of the jig temporarily to the baseplate, making sure that it is centred, and that the radial red and green lines line up.
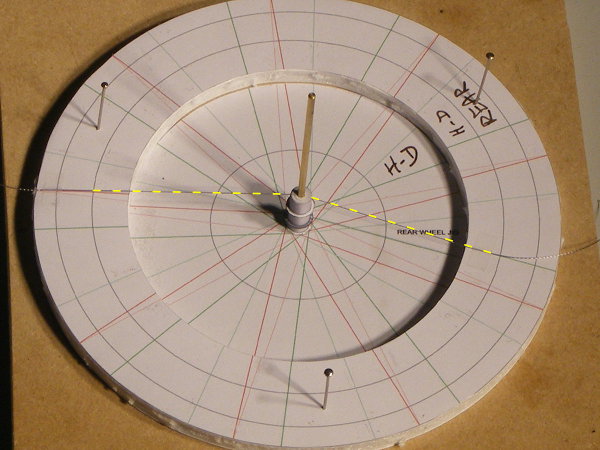
Take the thread which you have chosen for the spokes. For my half-size model I use ordinary polyester sewing thread in a silver-grey colour - for a full-size model it will need to be substantially thicker. Cut off a piece around 100mm more than the diameter of the jig and place it on the jig. The centre should rest on the upper hub flange on the side away from you. The right-hand side should lie over one of the darker green lines on the jig, and the left-hand side over a dark red one. Choose these lines so that the thread wraps round the hub as little as possible. Use a small square of sticky tape to fix the thread to the outer ring of the jig on each side, and pull gently on the ends to make sure that it is taut.
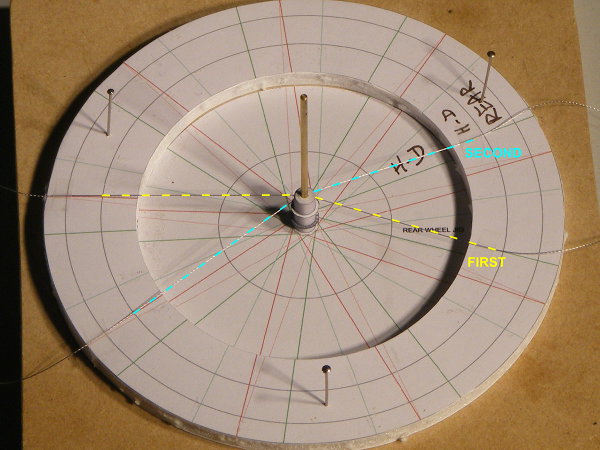
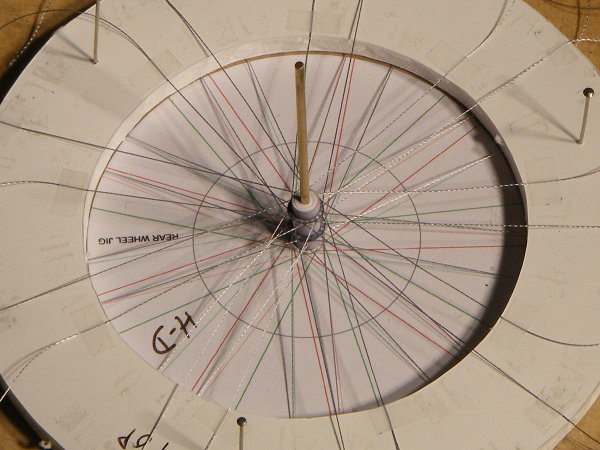
Take the next piece of thread, and fit it in the same way, using the the green and red lines which are next to the previous ones in an anticlockwise direction.
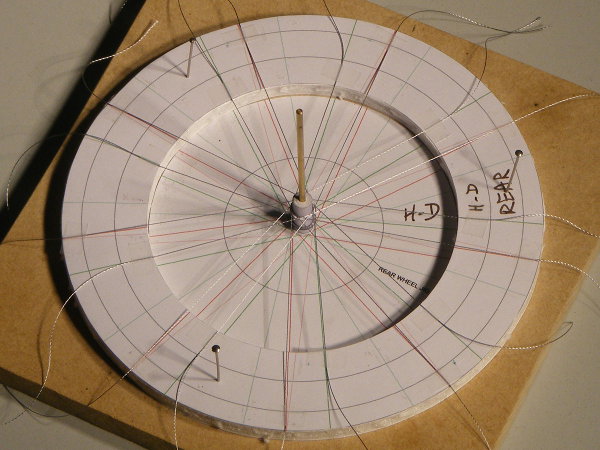
Repeat for the remaining sets of spokes. With the sixth set, the left-hand (red) side crosses one of the "green" spokes already installed. Thread it underneath this "green" spoke before fixing the end. The seventh crosses two "green" spokes, the eighth three, and the final one crosses four. In each case, pass the thread under all those "green" spokes but over any "red" spokes in between.
Check that all the spokes are taut, then fix them permanently to the hub, using small drops of superglue (cyanoacrylate). Then fit one of the remaining flanges (printed side up) and glue down on the threads.
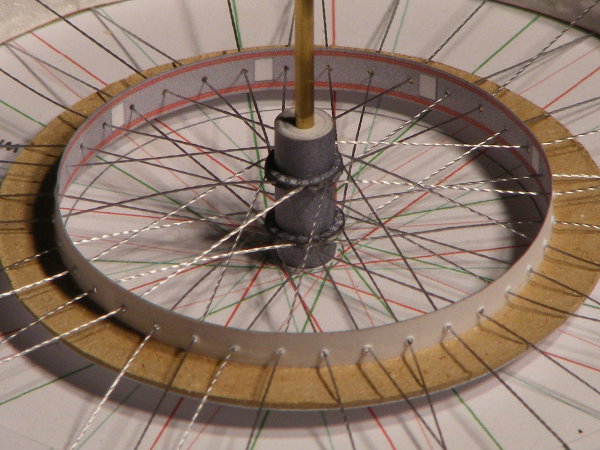
Carefully unpin the outer ring, and remove it and the central rod from the baseboard, and turn it all over, reinsert the rod in the central hole and push down the hub again. Align the installed spokes (now at the bottom) with the lighter-coloured green and red lines, and pin the outer ring to the baseboard again.
Repeat the whole process to install the spokes on this side of the wheel.
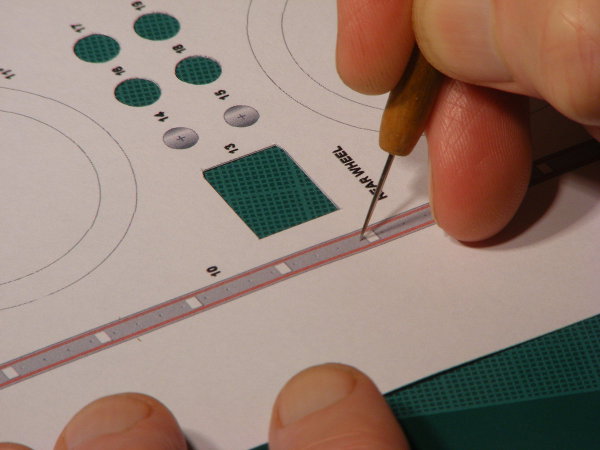
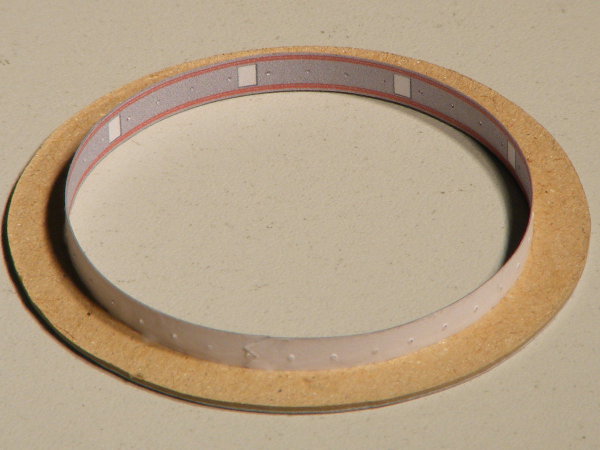
Now make the wheel rim. First pierce through at each of the 36 dots down the middle of the part - I use the end of a sewing needle set into a piece of dowelling as a handle. The size of the hole doesn't matter much, as it is only to locate the tip of a needle used to draw the threads through.
Then cut out the rim (E1 for the front wheel, E10 for the rear) and form it into a circle, printed side inwards. It may be necessary to cut a notch in the end tab, so that it doesn't block the end hole. Glue the rim formers (E2&3, E11&12) to card, approximately 1mm thick for full size and proportionately for other scales, and cut them out. Fit one former around the rim, and glue it flush with one edge. Check that the hole in the other former fits snugly around the rim, but do not fit it yet.
Free one thread end from the jig, thread it through the smallest sewing needle you can handle, and then pass it through one of the holes in the rim from inside to outside. Then reattach the thread to the jig exactly where it came from. Repeat for the next thread round, leaving one empty hole between this thread and the previous one, then continue all the way round. As you go, keep all the threads lightly tensioned so that the work stays neat, and the chance of tangles is minimised.
Turn the work over, and repeat the process for the threads on this side, using the remaining holes in the rim. If the threads are kept taut and tidy, it should be obvious which is the correct hole for each thread.
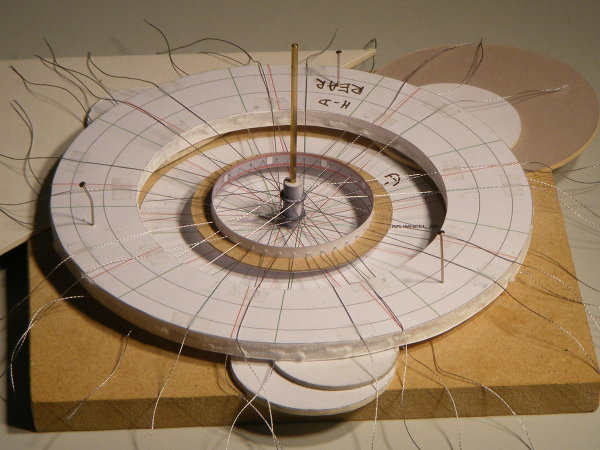
Again release one thread, pull the free end through to the other side of the jig and fasten it down in the same position as before, but on that side. Continue all round, moving one thread at a time and alternating sides, until all the threads cross from one side of the hub to the opposite side of the jig.
Turn the assembly so that the edge of the rim with the former attached is underneath, and place it on the base board. Use packing to raise the jig ring until it is centralised with respect to the hub flanges when the hub is pushed down on the baseboard.
Adjust the tension in all the threads so that there is no sag, and the wheel rim is centralised around the hub. Use a fairly slow-setting cement (I use quick-set epoxy) to lock each spoke to the wheel rim. Fit the second rim former over the rim, but do not glue it yet, and retension the spokes a final time.
When the glue is set, release all the threads from the jig, and check each one to ensure that it is adequately bonded to the rim, regluing any which is not, and letting it set under light tension. Only then trim all the threads to just inside the outer edge of the rim former, and then glue the second former to the other edge of the rim.
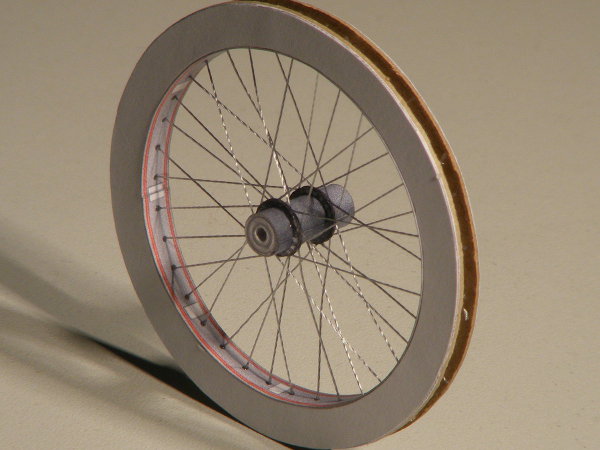
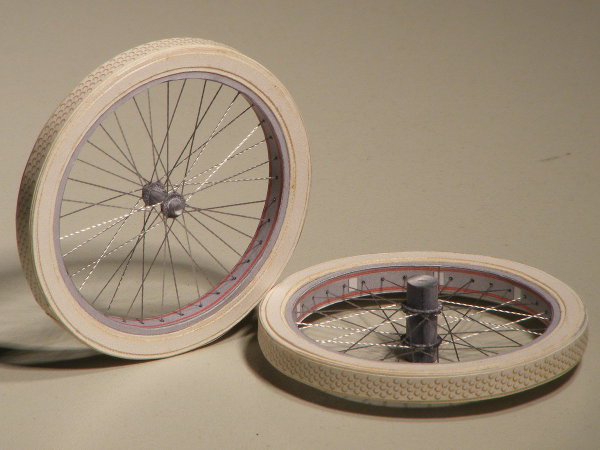
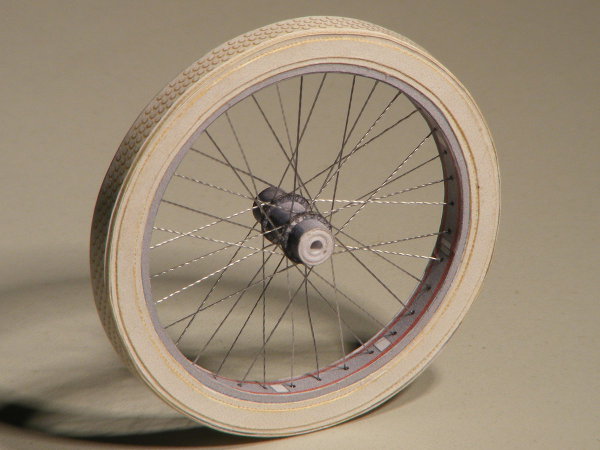
The wheel centre is now complete, and the tyre can be added.
Now do it all over again for the front wheel.
Two wheels in search of a motorbike...