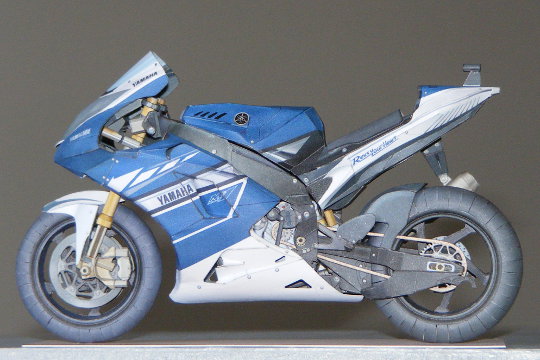
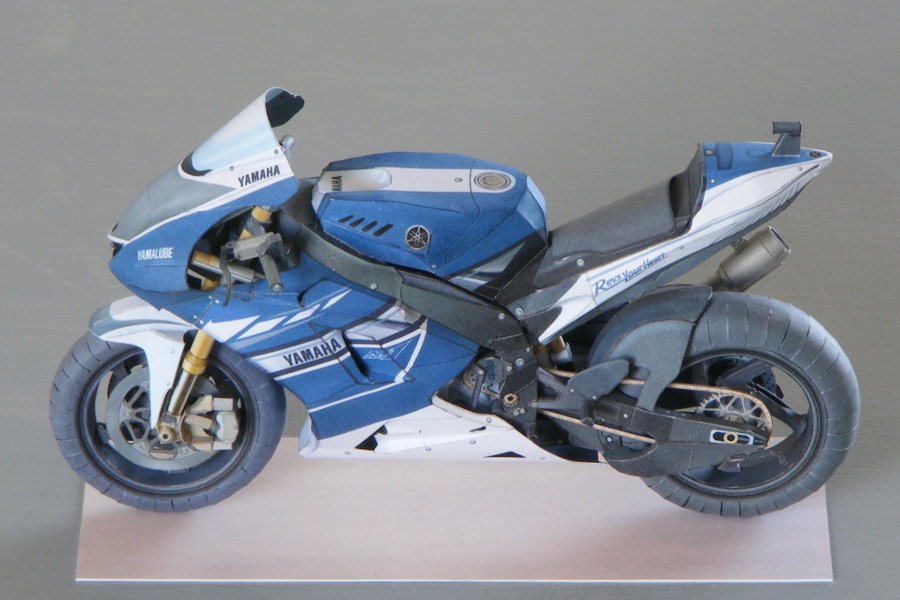
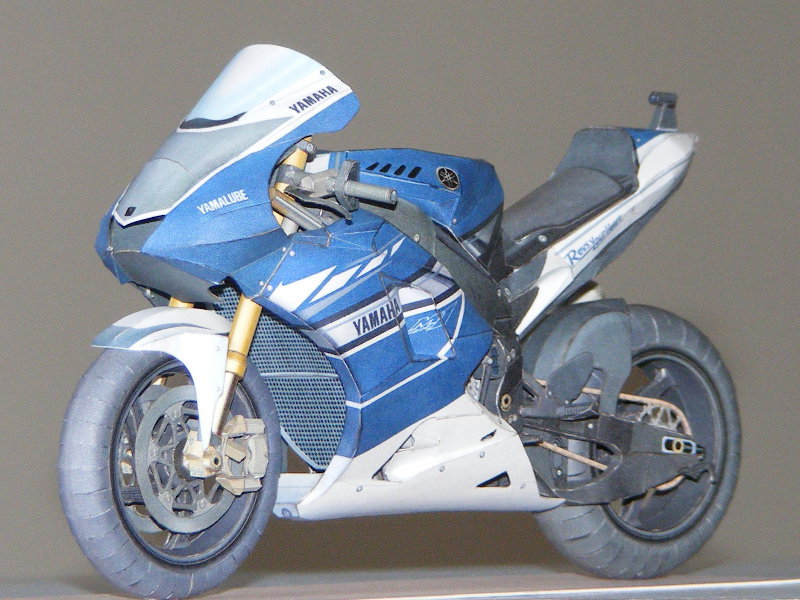
This model was published in December 2013 as part of a huge diorama depicting part of the Laguna Seca race track during a MotoGP race. The whole thing measures 1200 mm wide by 447 mm high by 495 mm deep! No scale is given, as usual, though to be fair the setting and background are deliberately distorted to suggest greater depth. The motorcycle itself appears close to 25% larger than the previous YZR-M1 models, and so matches the "Ultra-Realistic" series in this. However, it is not as complex as those models, having just over 400 parts compared with 540 for the MT-01 and nearly 800 for the VMAX.
The complete diorama comes in four PDF parts files for motorcycle, rider figure, background setting and framework to support the setting. There are three PDF files of assembly instructions, the background and framework being combined into one. The parts file for the motorcycle contains the following:
| Assembly | Pages | Parts |
|---|---|---|
| Front Cowl | 3 | 17 |
| Steering | 2 | 38 |
| Brake Caliper | 0.5 | 14 |
| Fuel Tank | 0.9 | 3 |
| Rear Fender | 1.6 | 16 |
| Under Cowl | 4 | 18 |
| Exhaust Pipes | 2 | 51 |
| Engine | 4 | 56 |
| Frame | 3 | 32 |
| Footrests | 1 | 14 |
| Radiator | 0.8 | 20 |
| Rear Suspension | 0.2 | 7 |
| Rear Arm | 3 | 14 |
| Stand | 1 | 20 |
| Wheel Spokes | 1 | 30 |
| Front Wheel | 0.5 | 4 |
| Front Tyre | 2.5 | 27 |
| Rear Wheel | 0.5 | 5 |
| Rear Tyre | 2.5 | 27 |
| TOTAL | 34 | 413 |
I built the model at 39% of the original size, so that it comes out the same scale as all my other Yamaha motorcycle models, i.e. 1:14.
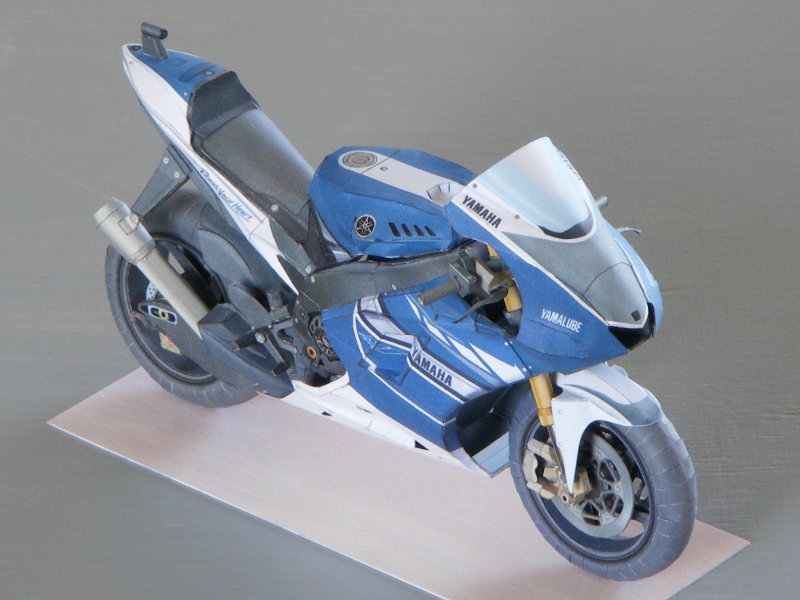
I had some fairly major fit problems with this model. For the most part the individual assemblies worked fine, though most major ones needed some correction to at least one component. However I had to do a significant amount of work to fit the assemblies together. This was not helped by a lack of diagrams or photographs showing how exactly they were to fit. There is an exploded diagram showing the assemblies and rather vague arrows indicating where they go, plus numerous photos of the completed model. Unfortunately, because a great deal of the complexity ends up hidden by the fairings, these photos are of limited help. Eventually I managed to get it together, but the model does show a few scars from the fight.
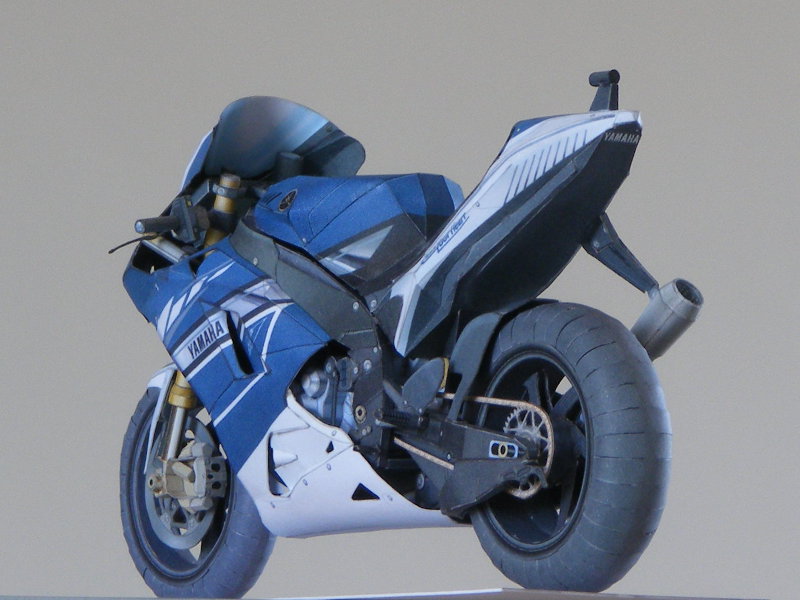
The wheels are a little strange. Each tyre is made in three 120° segments which plug together, and the assembly sequence suggests fitting the wheel centres early on, but only fitting the tyres around them right at the end. This seemed to me to be unnecessarily difficult, and resulting in rather odd-looking tyres, so I made conventional tyres fitted to the wheels first and then placed in the frame. I am not over-happy with the appearance of the "petal" tyres, as the lack of any tread pattern rather draws attention to the numerous joins.
|
|
|

|

|
|